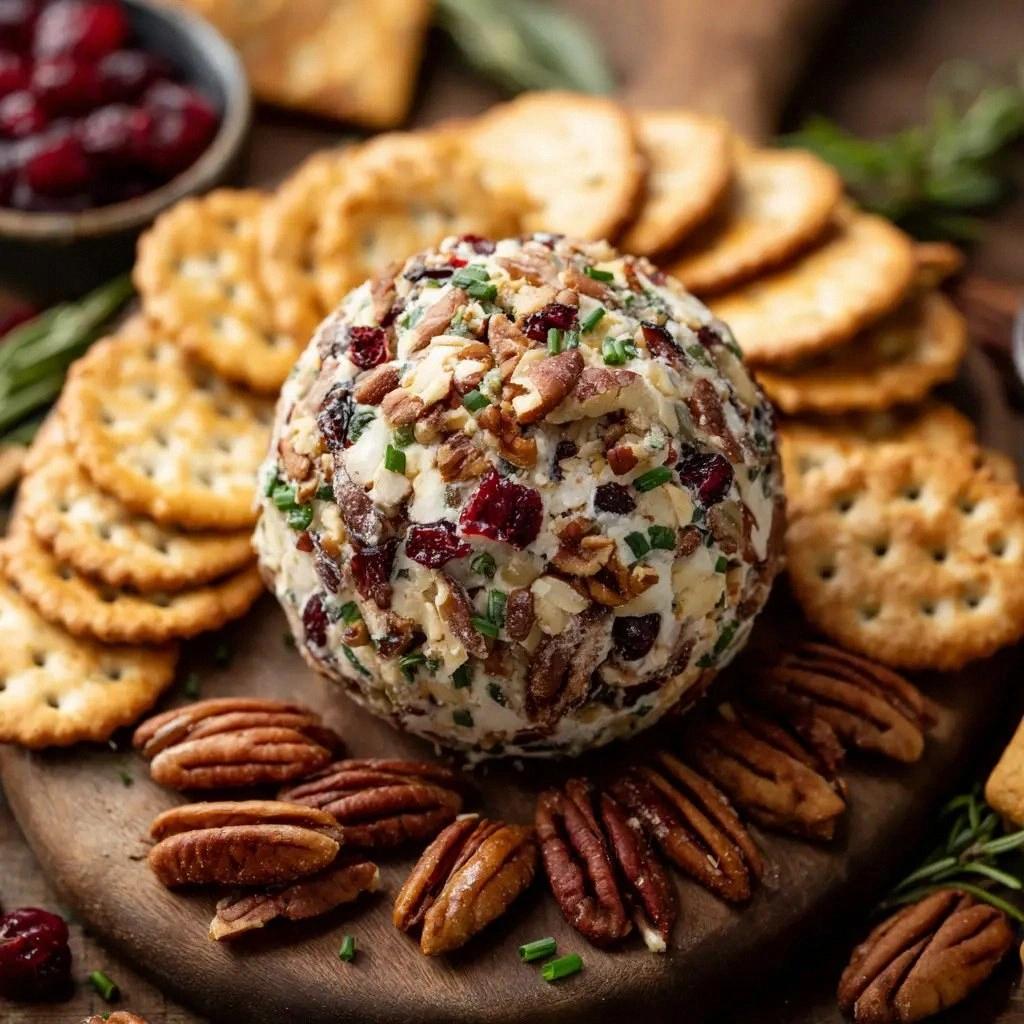
Picture this: a midnight snack attack, the kitchen lights flickering, and you realizing you have no idea how to turn that pile of cheese and bacon into something spectacular. I was in the same boat last night, rummaging through the fridge and feeling the urge to create something that would make my taste buds dance. I pulled out cream cheese, sharp cheddar, and a handful of pecans, and a spark of genius lit up. That moment was the birth of the ultimate cheese ball, a creamy, savory, and crunchy masterpiece that will become your new go-to appetizer. This is not just another cheese ball; it's a flavor revolution that will make you question every other recipe you've tried.
Imagine the first bite: a silky center of melted cheese that melts in your mouth, followed by a sudden crunch from pecans and crispy bacon that echoes like applause. The aroma is a savory symphony—cheese, bacon, and a hint of Worcestershire sauce mingle to create an irresistible scent that fills the kitchen. The texture is a delicate balance—soft, gooey, and surprisingly firm, so it holds its shape on a platter. The taste is bold, with a tangy kick from the Worcestershire and a subtle peppery bite that lingers. Every element works in harmony, turning a simple snack into an unforgettable experience.
What sets this version apart is the meticulous layering of flavors and textures that most recipes overlook. I dared to combine bacon with pecans, not just for crunch but for a nutty depth that complements the sharp cheddar. I added a splash of Worcestershire sauce to introduce umami and a slight tang that lifts the entire dish. I used green onions as a fresh, bright contrast that cuts through the richness. The result? A cheese ball that feels like a gourmet treat yet is effortlessly homemade. And the best part? It's made in under an hour, so you can impress guests without sacrificing your free time.
Now, I know you’re probably thinking, ‘I’ve tried cheese balls before, and they were dry or too cheesy.’ I hear you. That’s why I’ve refined every step, from the exact ratios to the baking technique, to ensure a moist center and a caramelized, crunchy exterior. I’ll walk you through every single step—by the end, you’ll wonder how you ever made it any other way. So grab your apron, and let’s dive into the only cheese ball recipe you’ll ever need.
What Makes This Version Stand Out
- Taste: The blend of sharp cheddar and creamy cream cheese creates a rich, velvety flavor that’s elevated by the umami punch of Worcestershire sauce. The subtle peppery undertone adds a sophisticated kick that lingers on the palate.
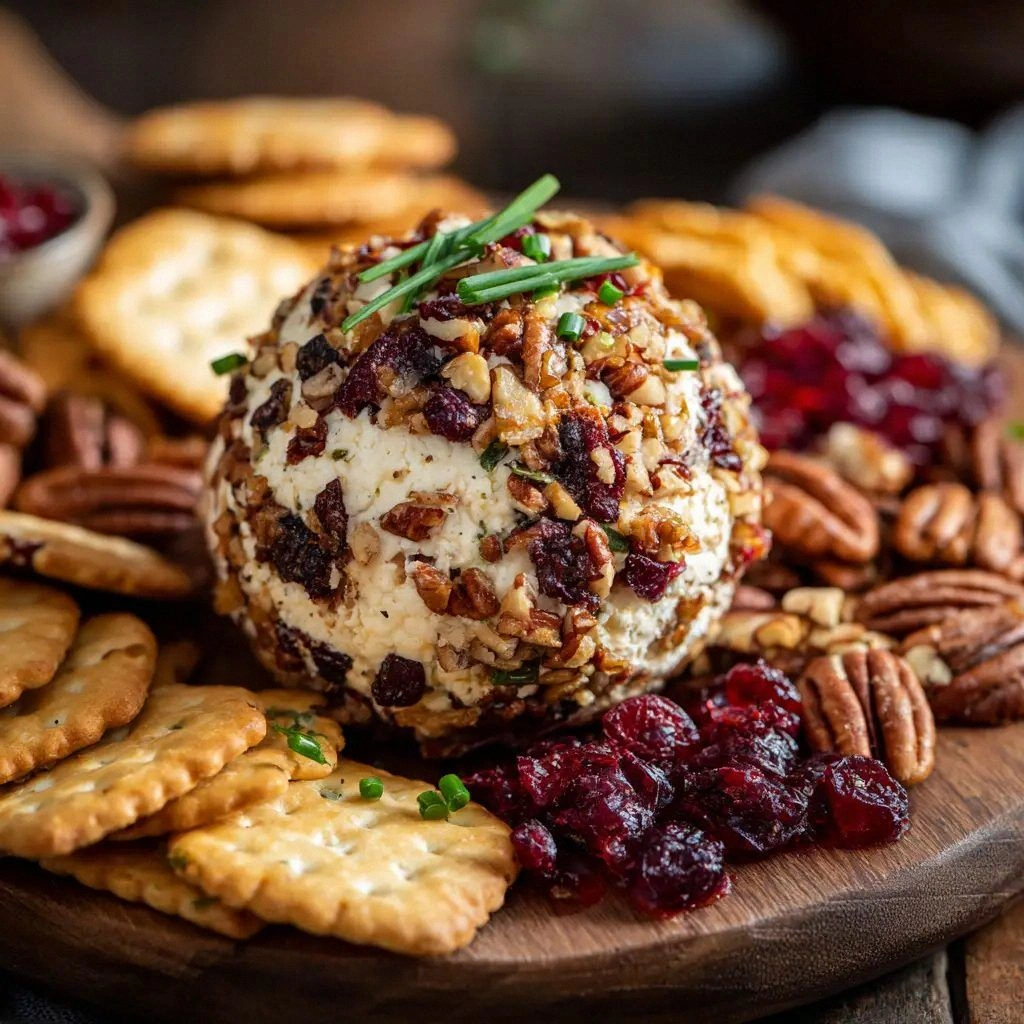
- Texture: A perfectly balanced bite that starts with a silky, gooey center and ends with a satisfying crunch from pecans and bacon. The exterior caramelizes just enough to give a golden crust without drying out the interior.
- Simplicity: No fancy equipment or obscure ingredients—just pantry staples that come together in a few easy steps. The recipe is designed for both seasoned cooks and kitchen rookies.
- Crowd Appeal: This cheese ball is a guaranteed hit at parties, game nights, or a cozy gathering. Its striking presentation and bold flavor will have guests begging for the recipe.
- Make‑Ahead: The ball can be assembled and chilled for up to 24 hours, making it a stress‑free option for last‑minute entertaining. The flavors deepen the longer it rests.
- Ingredient Quality: Using high‑quality cheddar and fresh bacon makes the difference between a decent and a sensational cheese ball. The pecans add a nutty aroma that enhances the overall profile.
- Unique Twist: The addition of a tablespoon of Worcestershire sauce is a game‑changer, providing depth and a subtle tang that sets this recipe apart from classic versions.
Inside the Ingredient List
The Flavor Base
The foundation of this cheese ball is a creamy duo of cream cheese and sharp cheddar. Cream cheese brings a silky texture and mild tang, while cheddar adds a robust, savory depth that pairs beautifully with the other components. Skipping either will leave the ball feeling flat and lacking complexity. For a richer taste, opt for a cheddar aged at least 12 months.
The Texture Crew
Pecans and bacon are the dynamic duo that inject crunch and savory flavor. The pecans deliver a buttery, slightly sweet bite that balances the saltiness of the bacon. The bacon, when crisped and chopped, adds a smoky, meaty element that keeps the center from becoming too dense. If you’re a nut allergy warrior, substitute with chopped toasted walnuts for a similar crunch.
The Unexpected Star
A splash of Worcestershire sauce might seem out of place, but it brings a subtle umami layer that elevates the entire dish. The sauce’s tang and slight sweetness cut through the richness of the cheeses, preventing the ball from feeling heavy. A pinch of garlic powder and black pepper add depth without overpowering the primary flavors. If you’re looking for a vegan version, use a plant‑based Worcestershire substitute.
The Final Flourish
Green onions provide a fresh, bright contrast that lifts the overall profile. Their mild sharpness balances the buttery notes and offers a pop of color when sliced thinly atop the finished ball. You can also sprinkle a few chopped fresh herbs, like parsley or chives, for an extra layer of aroma. Remember, the key to a memorable cheese ball is the harmony of its components, each playing its part perfectly.
The Method — Step by Step
- Preheat your oven to 350 °F (175 °C). In a medium bowl, combine the cream cheese and sharp cheddar, using a whisk or electric mixer until the mixture is silky smooth and free of lumps. This base will be the heart of your cheese ball, so take your time to ensure it’s perfectly blended.
- Stir in the Worcestershire sauce, garlic powder, and black pepper, mixing until everything is evenly incorporated. The sauce will give the mixture a subtle tang, while the spices add a layer of complexity that will carry through to the final bite. Don’t skip this step—it's the secret sauce that sets this recipe apart.
- Fold in the pecans, crispy bacon bits, and chopped green onions. This is where the texture magic happens: the nuts give crunch, the bacon adds savory depth, and the onions brighten the flavor profile. The mixture should feel cohesive yet packed with individual flavors.
- Line a baking sheet with parchment paper and shape the mixture into a round ball, about the size of a golf ball. Place the ball on the sheet, then wrap it tightly in aluminum foil to keep the moisture in during baking. This step ensures a uniform, golden crust.
- Bake for 35 minutes, then remove from the oven and let it rest for 5 minutes. The ball should feel firm to the touch but still slightly warm inside. This rest period allows the flavors to settle and the center to set.
- Remove the foil, let the ball cool to room temperature, then roll it in a shallow dish of finely chopped pecans for an extra crunch and a nutty aroma. This coating also gives the cheese ball a beautiful, rustic look that’s perfect for serving.
- Wrap the finished cheese ball in plastic wrap and refrigerate for at least 2 hours, or overnight for deeper flavor integration. When ready to serve, slice it into wedges or serve whole with crackers, sliced baguette, or fresh vegetables. The result is a showstopper that’s as delicious as it is visually stunning.
- Optional: Garnish with extra bacon strips or thinly sliced green onions for a pop of color and an extra flavor burst. A drizzle of hot sauce or a sprinkle of smoked paprika can add a subtle kick for those who love a little heat. Present the cheese ball on a wooden board for an authentic, rustic vibe.
Insider Tricks for Flawless Results
The Temperature Rule Nobody Follows
Many people bake cheese balls at 400 °F, but that often leads to a burnt exterior and a gooey interior. A lower 350 °F allows the cheese to set evenly while the crust develops a golden, caramelized finish. If you’re in a hurry, you can increase the temperature to 375 °F for 30 minutes, but watch the ball closely to avoid over‑browning.
Why Your Nose Knows Best
Before you even taste the ball, inhale the aroma—it’s a powerful indicator of how well the flavors have melded. A strong, buttery scent with hints of umami signals that the cheeses have fully integrated. If the smell feels off or too sharp, let the ball rest longer; the flavors will mellow with time.
The 5‑Minute Rest That Changes Everything
After baking, give the cheese ball a 5‑minute rest before unwrapping. This brief pause allows the heat to redistribute, preventing a sudden burst of molten cheese when you slice. It also gives the pecan coating time to set, reducing the chance of it falling off during serving.
Chill for Depth, Not Just Texture
Refrigerating the cheese ball for at least 2 hours—or overnight—lets the flavors marry and the texture firm up. The result is a more cohesive bite that’s easier to handle and slice. If you’re short on time, a quick 30‑minute chill still improves the overall mouthfeel.
Keep It Moist, Not Dry
If you notice the ball drying out during baking, add a splash of heavy cream or a dollop of sour cream to the mixture before shaping. The extra moisture keeps the center creamy and prevents the exterior from becoming overly crisp. Just remember to bake at the lower temperature to avoid over‑browning.
Creative Twists and Variations
This recipe is a playground. Here are some of my favorite ways to switch things up:
Spicy Jalapeño Version
Add finely diced jalapeño and a pinch of cayenne pepper to the base mixture for a fiery kick. The heat complements the savory bacon, creating a bold, spicy profile that’s perfect for summer cookouts.
Herb‑Infused Delight
Stir in chopped fresh rosemary and thyme for an aromatic, earthy twist. The herbs pair wonderfully with the sharp cheddar, giving the cheese ball a Mediterranean flair that pairs well with olives and crusty bread.
Smoked Salmon and Dill Variation
Swap the bacon for smoked salmon and add a handful of fresh dill. This version transforms the cheese ball into a sophisticated appetizer that’s ideal for brunch or a sophisticated dinner party.
Vegan Cheese Ball
Use a plant‑based cream cheese and vegan cheddar, and replace bacon with crispy tempeh or vegan bacon bits. The result is a dairy‑free version that still delivers on flavor and texture.
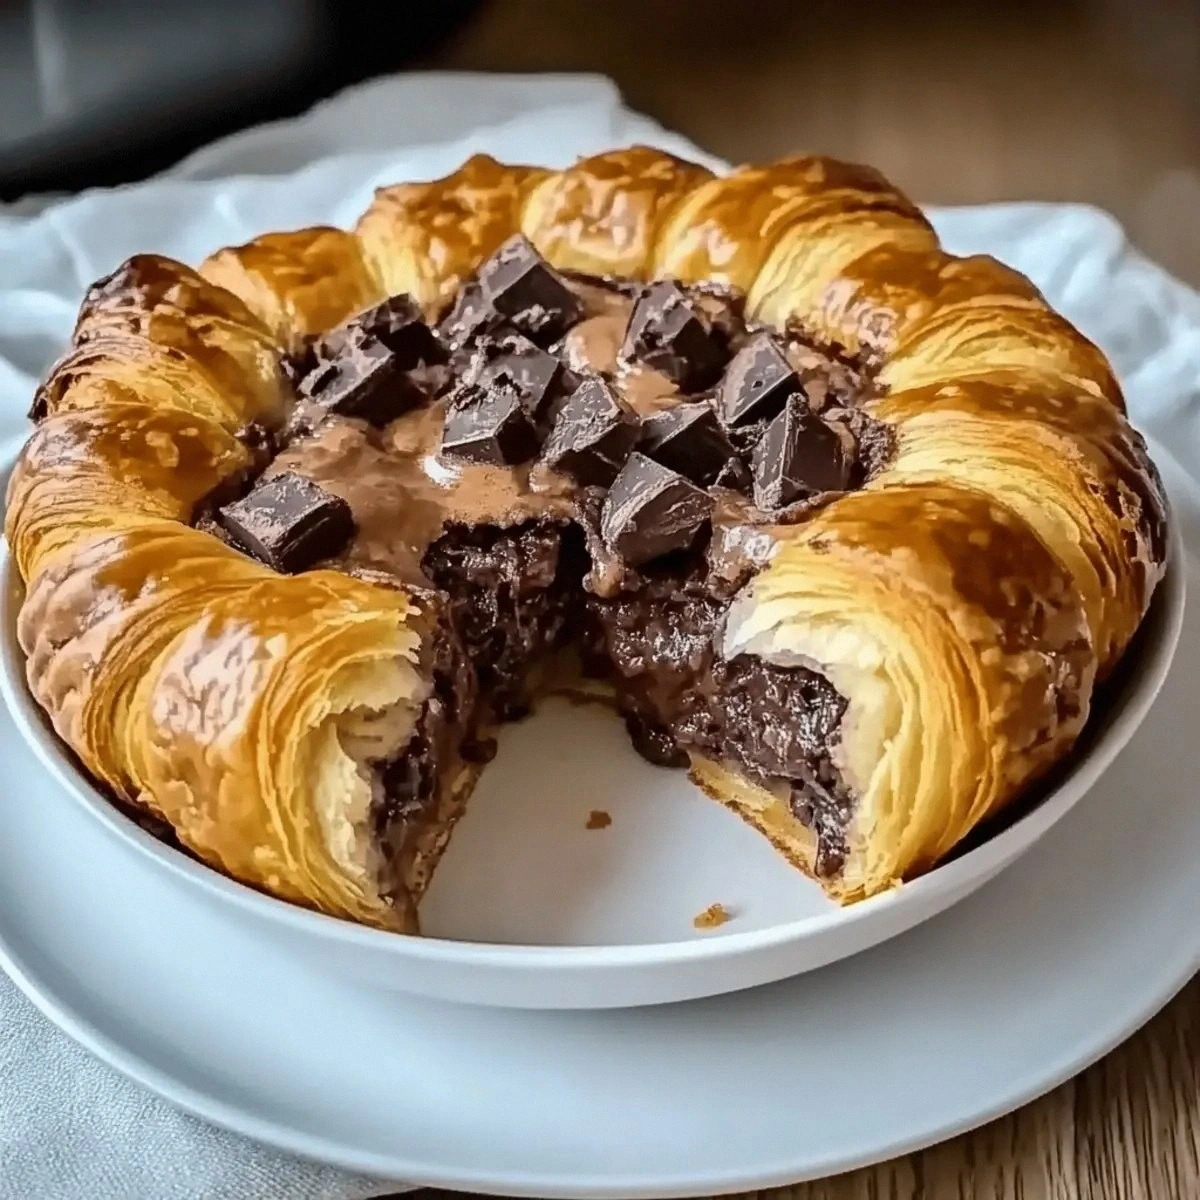
Chocolate‑Nut Surprise
Mix in a handful of dark chocolate chips and replace pecans with chopped walnuts for a decadent, sweet‑savory combo. This version is a hit with chocolate lovers and adds a surprising twist to the classic.
Gluten‑Free Crunch
Roll the finished cheese ball in crushed gluten‑free crackers or cornflakes for a crispy coating that’s safe for gluten‑sensitive guests. The crunchy exterior adds a delightful contrast to the creamy interior.
Storing and Bringing It Back to Life
Fridge Storage
Wrap the cheese ball tightly in plastic wrap and place it in an airtight container. Store in the refrigerator for up to 4 days. The cold environment keeps the cheeses firm and prevents bacterial growth.
Freezer Friendly
For longer storage, wrap the ball in foil, then place it in a freezer bag. Freeze for up to 3 months. When ready, thaw in the refrigerator overnight before reheating.
Best Reheating Method
Preheat your oven to 350 °F and place the cheese ball on a parchment‑lined sheet. Reheat for 15 minutes, or until warmed through. Add a splash of water to the center before reheating to create steam, which restores moisture and prevents the interior from drying out.