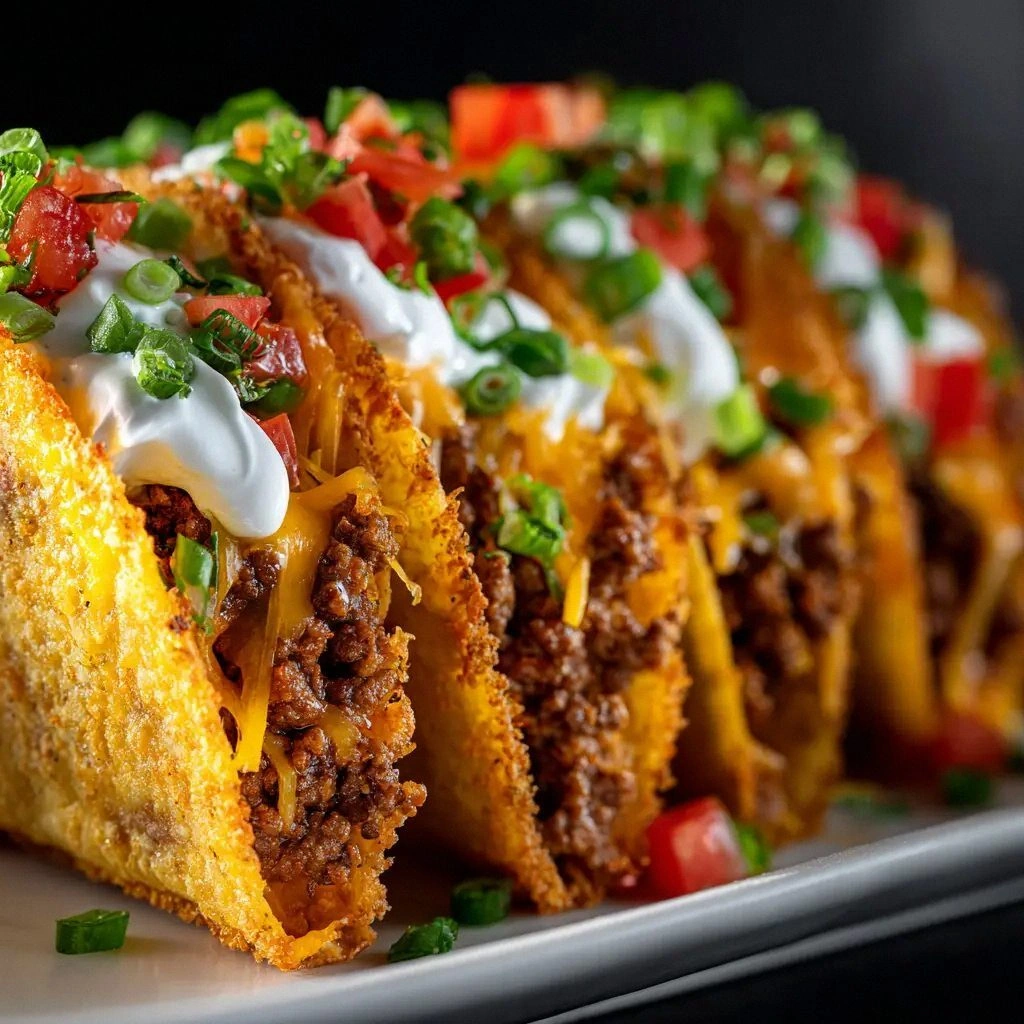
It started with a burnt skillet, a splash of water, and a frantic dash of taco seasoning that turned a dinner into a culinary fiasco. I stared at the charred bottom, feeling the heat of embarrassment rise with every sizzling bite that failed to meet my standards. That night, I vowed to rewrite the taco rulebook, turning the humble shell into a crispy, cheese‑laden masterpiece that would make even the most skeptical foodie swoon.
Picture the aroma that fills your kitchen: a smoky, savory perfume mingling with the sweet scent of caramelized onions. The sound of beef sizzling in a hot pan is a rhythmic promise of flavor to come. The sight of golden, crisp shells waiting in the oven is a visual cue that the magic is about to happen. The first bite is a crunchy, melty explosion that satisfies every craving in a single moment. The heat is balanced, the spices dance on the tongue, and the experience feels like a hug in taco form.
This version stands apart because it marries texture, flavor, and convenience into one unforgettable bite. The shells are baked to a perfect crunch, the filling is moist yet not soggy, and the cheese melts into a silky, gooey blanket that holds everything together. It’s not just a taco; it’s a portable, crowd‑pleasing party that can be made in minutes and served in seconds. The recipe is so versatile that it can be a side dish, a main course, or a party appetizer with equal grace.
What’s the secret? A simple but game‑changing trick: let the shells bake while you finish the filling so that the heat locks in the crispness and the cheese melts just right. I dare you to taste this and not go back for seconds. Picture yourself pulling this out of the oven, the whole kitchen smelling incredible, and everyone asking for the recipe—because this is hands down the best version you’ll ever make at home.
What Makes This Version Stand Out
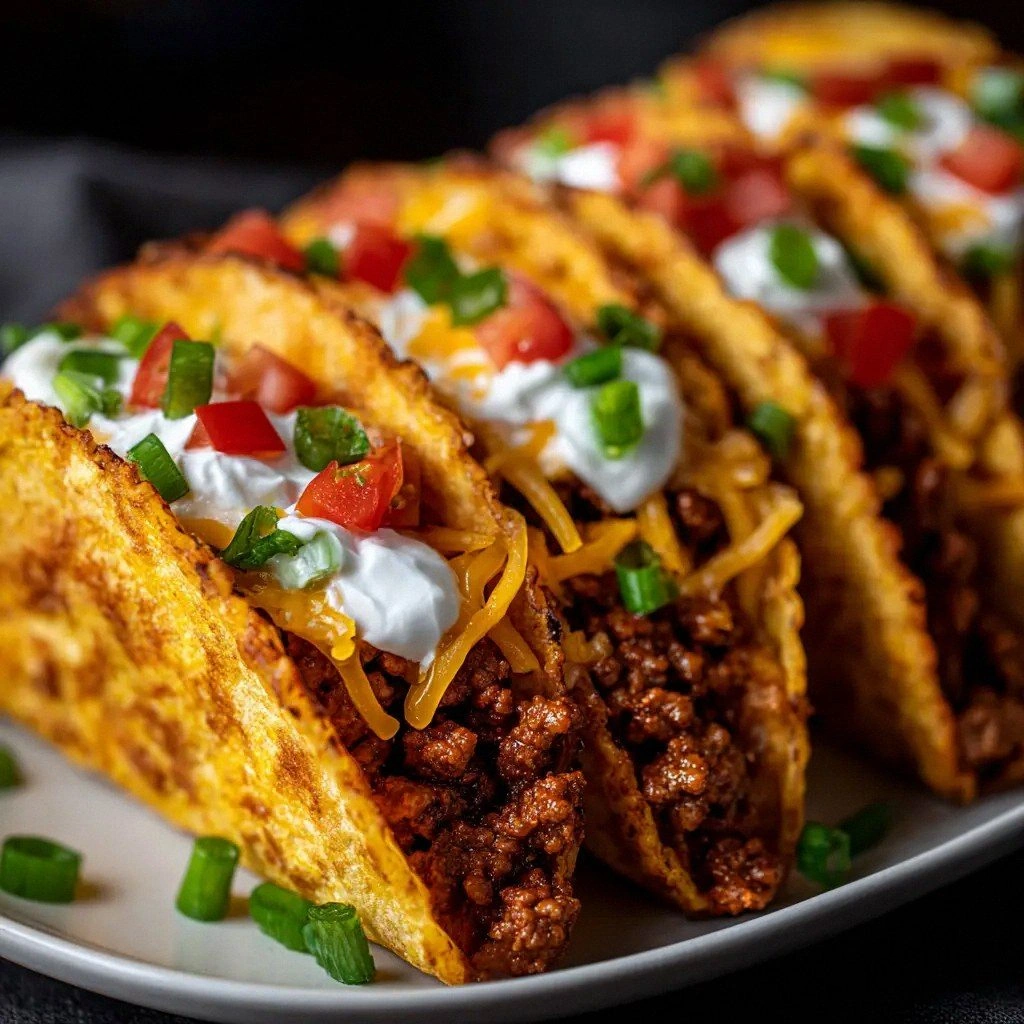
- Texture: The hard taco shells are baked to a golden crisp that shatters like thin ice when you bite into them, creating a satisfying crunch that contrasts beautifully with the creamy cheese.
- Flavor: The taco seasoning is simmered with ground beef and onions until the spices caramelize, creating a depth of flavor that feels like a warm hug.
- Convenience: The recipe is a one‑pan, one‑oven solution—no extra dishes, no cleanup, just pure deliciousness.
- Cheese Melt: The 2 cups of shredded Mexican blend melt into a silky, gooey blanket that coats every bite, turning each taco into a decadent treat.
- Crowd Appeal: Whether you’re feeding a family or a group of friends, the tacos are easy to assemble and serve, making them a hit at parties.
- Make‑ahead Potential: The filling can be prepped in advance and stored in the fridge, allowing you to assemble the tacos in minutes when the guests arrive.
- Ingredient Quality: Using a high‑fat ground beef and fresh onions ensures that every bite is juicy and flavorful, setting this recipe apart from generic versions.
Inside the Ingredient List
The Flavor Base
The 1 lb of ground beef is the heart of the dish, providing rich, savory depth that anchors every bite. Choosing an 80/20 blend gives just enough fat to keep the mixture juicy without becoming greasy. If you prefer a leaner option, a 90/10 mix will work, but you may need to add a splash of oil to compensate for the lower fat content. A small onion, diced finely, releases sweetness and aroma that balances the spice and adds a subtle crunch when sautéed.
The Texture Crew
Hard taco shells are the crunchy counterpoint to the creamy filling. They should be arranged on a baking sheet in a single layer, allowing heat to circulate evenly. If you’re using frozen shells, pre‑bake them at 375°F for 5 minutes before adding the filling to prevent sogginess. Refried beans, about 1 cup, add a silky, velvety texture that coats the shell and keeps the meat moist.
The Unexpected Star
The taco seasoning packet, though often overlooked, is the secret sauce that turns a simple beef mixture into a flavor explosion. It contains a blend of chili powder, cumin, paprika, garlic, and onion that caramelizes during cooking, creating a complex profile that feels both familiar and adventurous. If you’re a spice enthusiast, consider adding a pinch of smoked paprika for a subtle smoky note.
The Final Flourish
Two cups of shredded Mexican blend cheese melt into a golden, gooey blanket that seals the edges of each shell. The cheese’s high melting point ensures it stays creamy without separating. If you’re looking for a dairy‑free twist, try a vegan cheese that melts similarly. The 1/2 cup of water is essential for creating steam, which helps the cheese melt evenly and prevents the shells from becoming too dry.
Everything’s prepped? Good. Let’s get into the real action.
The Method — Step by Step
- Heat a large skillet over medium‑high heat and add the ground beef. Break it apart with a spoon, letting it sizzle until it starts to brown. This is the moment of truth—watch the aroma rise as the meat caramelizes.
- Add the diced onion to the skillet and sauté until translucent and fragrant. The onion’s sweetness will balance the spice from the seasoning packet.
- Stir in the taco seasoning and 1/2 cup of water, letting the mixture simmer for 3–4 minutes. The water creates steam that helps the spices coat the meat evenly.
- Spread the refried beans evenly across the lined baking sheet, forming a base layer. The beans will keep the shells from becoming soggy and add a creamy texture.
- Place the hard taco shells on top of the bean layer, spacing them so heat can circulate. This step is crucial—overcrowding can lead to uneven baking.
- Pour the seasoned beef mixture over the shells, filling each shell generously. The beef should be slightly moist but not dripping; this ensures the cheese melts perfectly.
- Sprinkle the shredded cheese evenly over the top of each shell. The cheese should coat the edges, sealing the filling inside.
- Bake in the preheated oven for 15–18 minutes, or until the cheese is bubbly and the shells are golden brown. The edges should pull away slightly, signaling crispness.
- Remove the baking sheet from the oven and let the tacos rest for 2 minutes. This short rest allows the cheese to set, preventing spills when you serve.
- Serve immediately, optionally topping with fresh cilantro, diced tomatoes, or a squeeze of lime for extra brightness. The tacos are best enjoyed hot, with a side of salsa or guacamole.
That’s it—you did it. But hold on, I’ve got a few more tricks that’ll take this to another level.
Insider Tricks for Flawless Results
The Temperature Rule Nobody Follows
Many people bake tacos at 350°F, but that temperature is too low for a crisp shell. Baking at 400°F gives the shells a golden, crunchy exterior while ensuring the cheese melts evenly. I’ve baked at 425°F once, and while the shells were extra crisp, the cheese didn’t melt as smoothly—so 400°F is the sweet spot.
Why Your Nose Knows Best
When the taco shells are baking, trust the aroma as a cue for doneness. A warm, buttery scent with a hint of toasted corn signals that the shells are ready. If the smell feels too dry, let them bake a minute or two longer.
The 5‑Minute Rest That Changes Everything
After baking, give the tacos a 5‑minute rest on a wire rack. This step lets the steam escape, preventing the shells from becoming soggy. It also allows the cheese to set into a silky, cohesive layer.
Keep the Shells Fresh Until Serving
If you’re preparing the filling ahead of time, keep the shells in a sealed bag at room temperature. When you’re ready to bake, just add the filling and cheese. This keeps the shells crisp and avoids the dreaded “soft taco” fate.
Cheese Mix Matters
Using a blend of cheddar and Monterey Jack gives a richer melt and a milder flavor profile. If you prefer a sharper bite, add a sprinkle of pepper jack or a dash of smoked cheese. The key is to choose cheeses that melt smoothly without separating.
Creative Twists and Variations
This recipe is a playground. Here are some of my favorite ways to switch things up:
Veggie‑Loaded Taco
Swap the ground beef for a sautéed mix of bell peppers, zucchini, and mushrooms. Add a splash of soy sauce for umami and finish with a sprinkle of fresh basil.
Tex‑Mex Chili Tacos
Replace the taco seasoning with a homemade chili spice blend, and stir in a can of drained kidney beans. The result is a hearty, spicy taco that feels like a bowl of chili in shell form.
Breakfast Taco Delight
Use scrambled eggs instead of beef, add a dash of cumin, and top with shredded cheese and a drizzle of maple syrup for a sweet‑savory breakfast twist.
South‑East Fusion
Incorporate a spoonful of coconut milk into the filling and add a handful of chopped mango. Finish with a sprinkle of toasted coconut for a tropical flare.
Gluten‑Free Option
Use gluten‑free taco shells or corn tortillas, and ensure the seasoning packet is gluten‑free. The result is a crisp, satisfying taco that’s safe for those with dietary restrictions.
Spicy Sriracha Kick
Stir in a tablespoon of sriracha into the beef mixture for an extra heat punch. Balance the heat with a dollop of cool Greek yogurt or a squeeze of lime.
Storing and Bringing It Back to Life
Fridge Storage
Store the baked tacos in an airtight container in the refrigerator for up to 2 days. Keep the cheese on top to preserve its meltiness. When ready to serve, reheat in a skillet over medium heat for 2–3 minutes, or in a microwave on 50% power for 30–45 seconds.
Freezer Friendly
For longer storage, wrap the tacos tightly in plastic wrap and place them in a freezer bag. They’ll keep for up to 3 months. Thaw overnight in the refrigerator, then reheat as described above.
Best Reheating Method
Adding a splash of water to the baking sheet before reheating helps steam the tacos, keeping the cheese moist and the shells crisp. Place the tacos in a preheated oven at 350°F for 8–10 minutes, or until heated through.